After all the writing, editing and formatting of your manuscript and designing your book cover, you have finally come to the part you have been waiting for: to self-publish your book on Amazon KDP.
If this is your first book, congratulations for making it this far! I know that writing a book can be a daunting task and a lot of people give up before completing the first draft, but not you. You stuck with it until your book was completed and now you are ready to publish it on Amazon for the whole world to see.
In this blog post, I will show you how to self-publish your book on Amazon’s Kindle Direct Publishing. It is very easy to use and it only takes about 24 hours for your book to be made available in Amazon’s Kindle Store.
Self-publishing your book on Amazon is completely free and, depending on how you price your book, you can earn up to 70% in royalties. Not only can you publish your book as a Kindle, but you can also publish it in print format.
Because I live in the UK, I will be using Kindle Direct Publishing at Amazon.co.uk. But, if you live in the USA, please visit Amazon.com to get started publishing your book. The following steps will show you how to self-publish your book on Amazon.
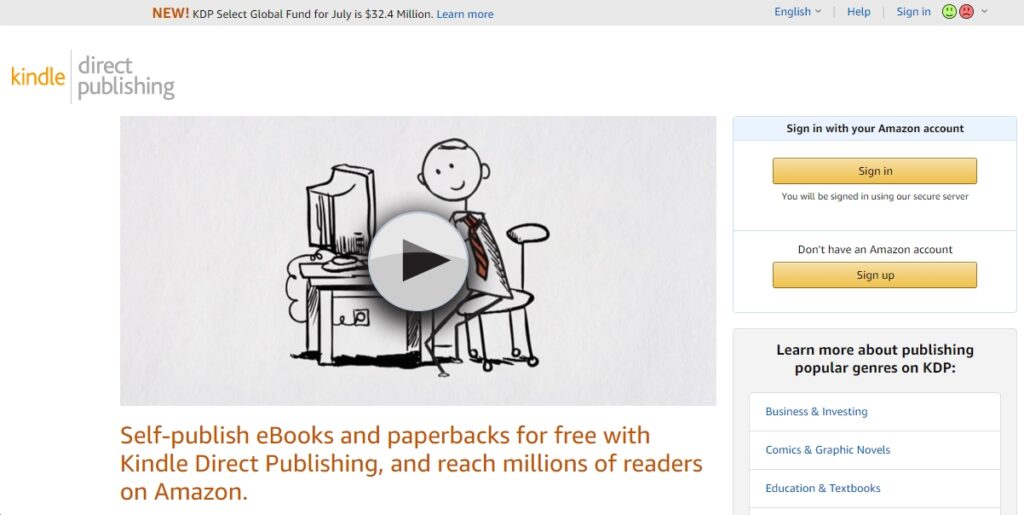
Step 1: Sign up or Sign in to Kindle Direct Publishing.
Go to Amazon.co.uk, scroll down to the bottom of the page and click on Independently Publish with Us. If you live in America, go to Amazon.com, scroll down to the bottom and click on Self-Publish with Us.
Click Sign Up to create a new account with Kindle Direct Publishing. If you already have an account, click Sign In and simply enter your email address and password to sign in.
Follow the instructions to create your new KDP account. Once you are signed in, you will be taken to the Bookshelf page.
Step 2: Click on Kindle eBook to create a new title.
Under the section, Create a New Title, you will see two options: Kindle eBook and Paperback. Select Kindle eBook to create a new title.
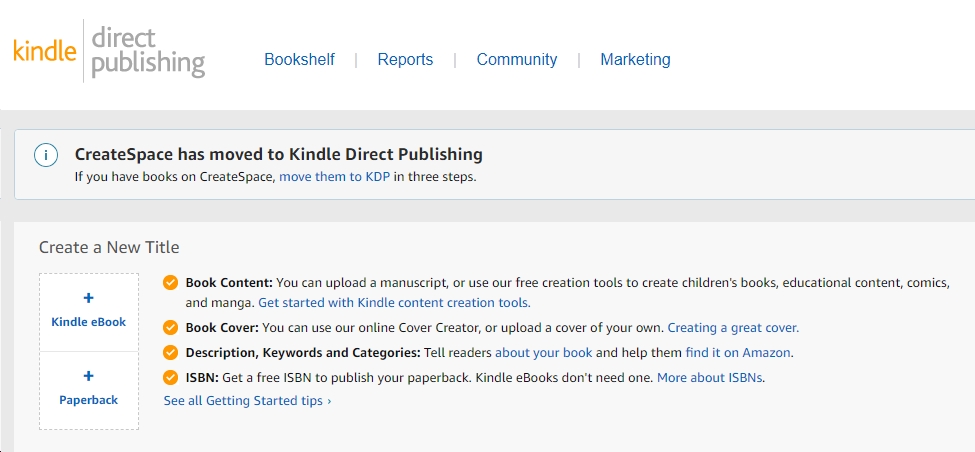
This will bring up the page where you enter the details to publish your Kindle eBook.
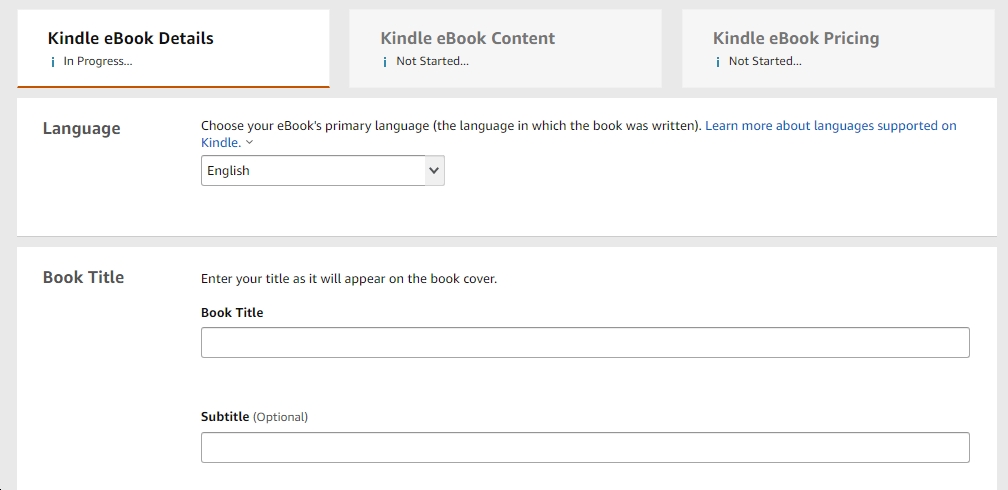
Step 3: Enter the details of your Kindle eBook.
- In the Language section, choose the language that your book was written in from the drop-down list. There are over 40 languages that Amazon has listed.
- Enter the title of your book in the Book Title section and a sub-title if you have one. The title you enter should be the same as what will appear on your book cover.
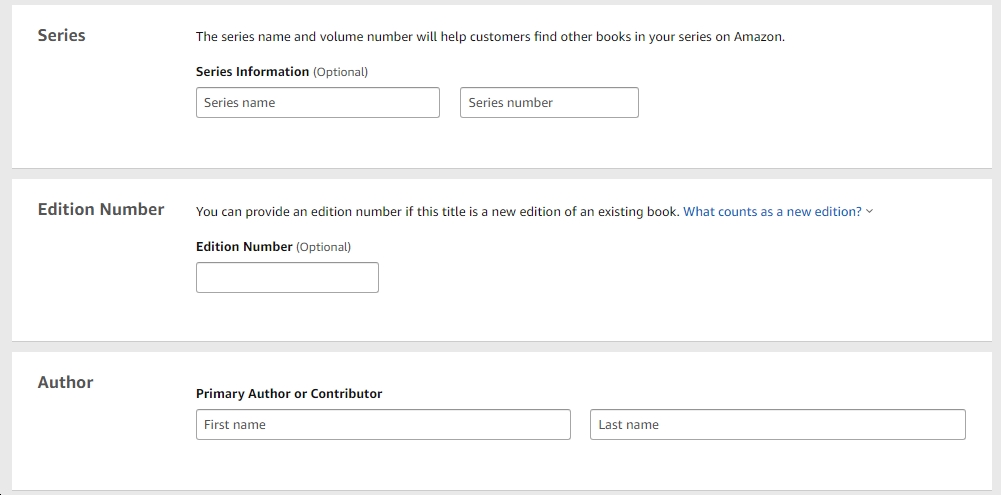
3. If your book is part of a series, then enter the Series Name and Series Number so that your readers will be able to find other books in your series listed on Amazon.
4. The Edition section is optional. You only need to fill in this section if your book is new or is an updated version of the original. If it is a new book enter number 1. If it is an updated version containing a few changes, enter number 2. But again, this is optional.
5. In the Author section, enter your first and last name since you are the author of your book. If you want to use a pseudonym (pen name) then you can enter that instead of your real name.
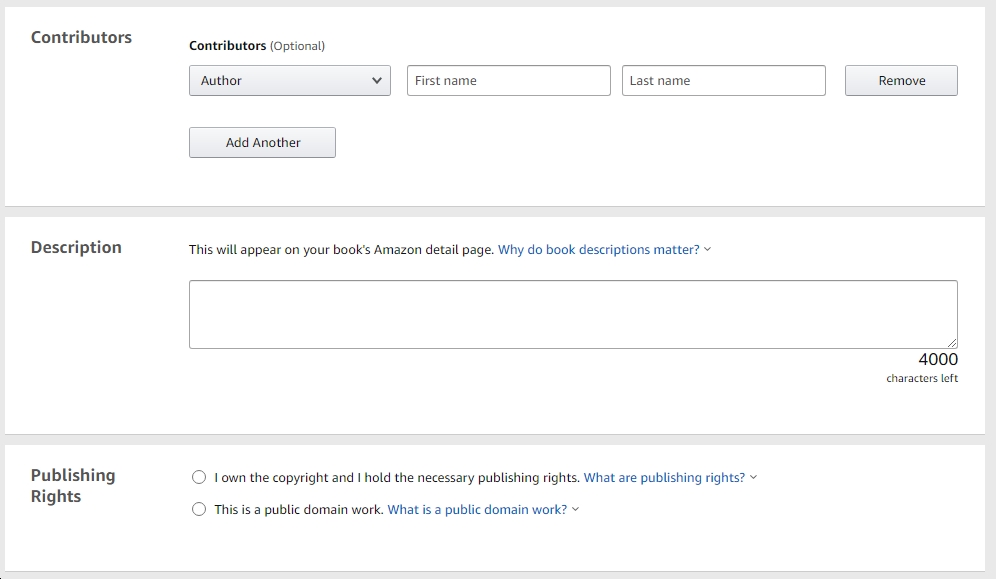
6. The Contributors section is also optional. Only fill in this section if there were other people who contributed to writing your book. If you had an editor who contributed to your book, for example, choose Editor from the drop-down list and enter their first and last name. If there were other contributors, click on Add Another and enter the names and select their position from the drop-down list. Click Remove if you want to delete one of the names you entered in the Contributors section.
7. In the Description section, Amazon allows you to enter 4000 characters in this section. The characters include the text, spaces between text, and punctuation. You can write a long description or it can be short. In your description, first, write about the problem that your reader is experiencing. Then explain how your book solves that problem. Include a paragraph briefly describing why you are qualified to write this book. Make sure that you also include a call to action so that people will be compelled to buy your book.
8. Assuming that you are the owner of your book, select the option “I own the copyright and I hold the necessary publishing rights” in the Publishing Rights section.
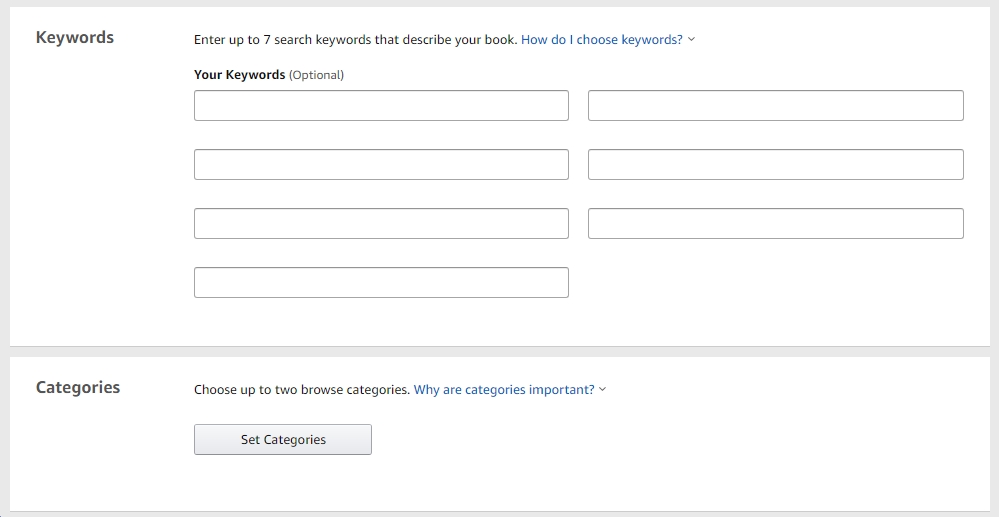
9. In the Keywords section, you are allowed to enter up to 7 keywords to help readers find your book. Amazon advises that you use keywords other than the ones you have already used in your title, in the category, or in your book’s description.
If you need help, use Amazon’s search engine to come up with keywords for your book. Select the Kindle Store or Books from the Category drop-down list and start typing a word to see how Amazon completes your search phrase. The results in the search box will show the most popular phrases that people use to search for books. Use the phrases that Amazon comes up with to enter in the Keyword section.

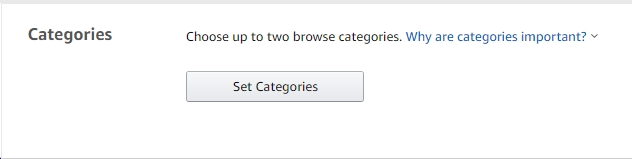
10. The Categories section is where you will choose two browse categories for your book. This section is important because this is where readers will find your book on Amazon. Click Set Categories to select the two browse categories for your book.
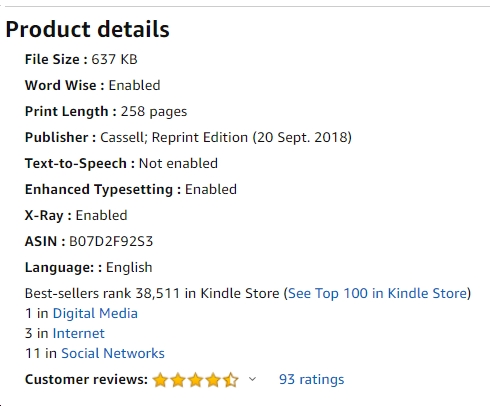
In order to choose the best categories for your book, search for best-selling books that are similar to your book. On the book’s sales page, scroll down to the Product Details, and look at the best-seller’s rank for that book. It will show you what categories the book has a best-sellers rank in. For example, a book about social media has a best-seller’s rank in Digital Media, Internet, and Social Networks. If you wrote a book about social media, then you should choose the Digital Media and Social Networks categories. If you cannot find these specific categories, then search for ones that are closest to those terms.
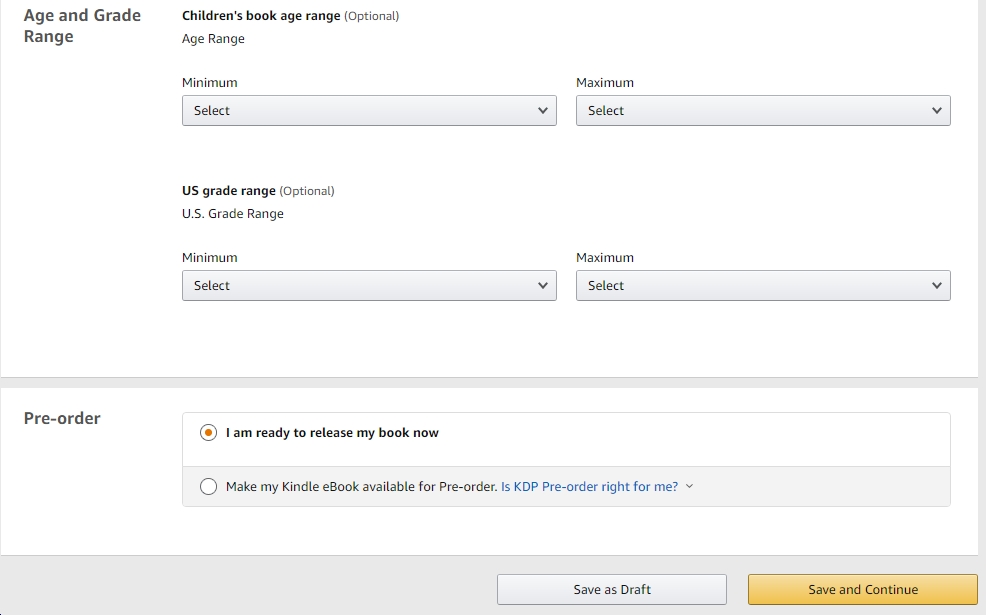
11. The Age and Grade Range section is optional and you only need to fill this section if you have written a book for children. If you wrote your book for adults then you can leave this section blank.
12. There are two options in the Pre-Order section regarding the release of your book. You can either release your eBook now or make it available for pre-order. I always choose the first option “I am ready to release my book now”.
13. Once you have filled in all of the appropriate sections on the Kindle eBook Details page, you are ready to move on to uploading your content. Click Save and Continue to move on to the next page or Save as Draft to come back to this section another time.
Step 4: Upload Your Manuscript and Book Cover Image
On the Kindle eBook Content page, I will show you how to upload your manuscript and your book cover. There are also other sections on this page that need to be completed.
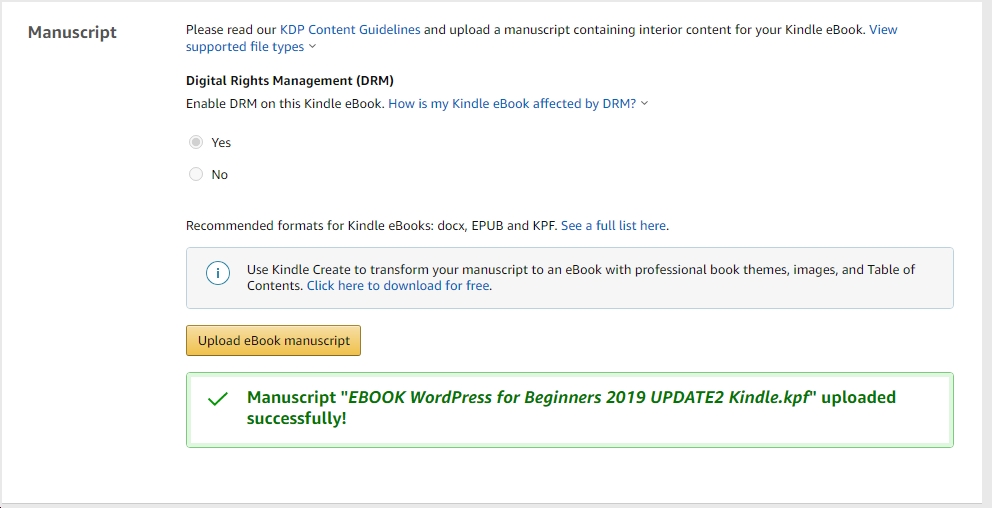
- Choose whether you want to enable Digital Rights Management on your eBook. Digital Rights Management (DRM) stops the unauthorized distribution of your Kindle eBook. If you don’t want people to share your book, select “Yes” to enable DRM. If you want people to distribute your book, select “No”. I do not want people to distribute my eBook so I selected “Yes” to enable DRM.
2. If you followed KDP’s guidelines for formatting your book, then you should have a completed manuscript ready to upload. Click Upload eBook Manuscript. Select your file from the appropriate folder and click Open. Your eBook will then be uploaded to Kindle Direct Publishing. A message will appear below stating that your manuscript was uploaded successfully.
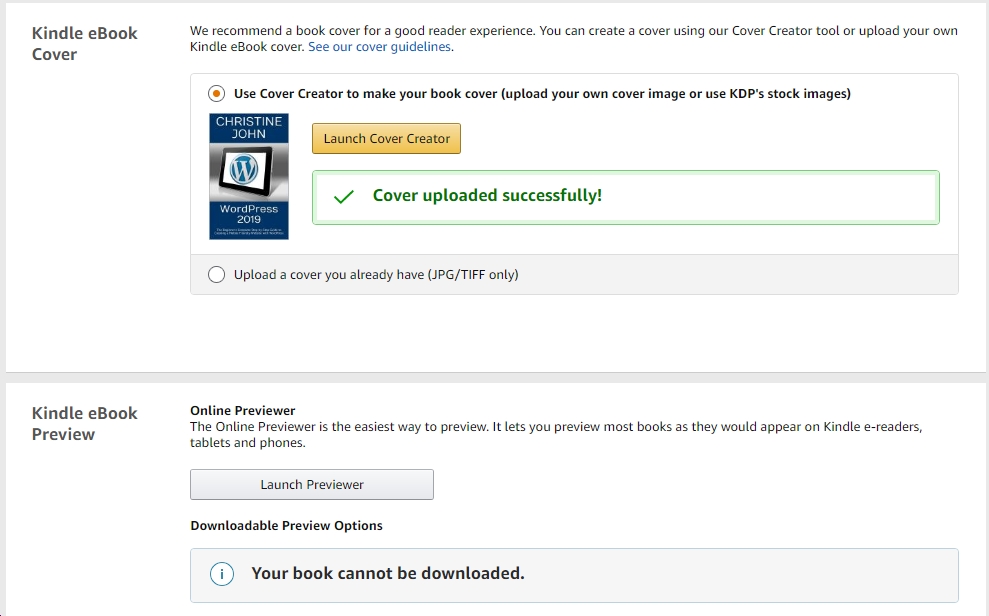
3. In the Kindle eBook Cover section, you should already have a book cover ready to upload. In this section, KDP offers a free Cover Creator tool that you can use to design your book cover. It contains photos, eBook templates, and different types of fonts you can use to create your book cover. Click on Launch Cover Creator and follow the instructions to design a cover for your eBook. It is very easy to use. In this case, I used the Cover Creator tool to design my book cover. On the other hand, if you have already designed a book cover, click on “Upload a cover you already have (JPG/TIFF only)”. Select your book cover image and click Open to upload to KDP. A message will appear stating that your cover was uploaded successfully.
4. Once your eBook manuscript and cover have been uploaded, you will be able to see a preview of your Kindle eBook. In some cases, you may not be able to download your book, but you can use the Online Previewer to see how your book will look once it is published. Click on Launch Previewer in the Kindle eBook Preview section to open your eBook to see if it has been formatted correctly and to see if there are any changes that need to be made before you publish your book. If you see any mistakes, you can make corrections to your file and then re-upload it to KDP.
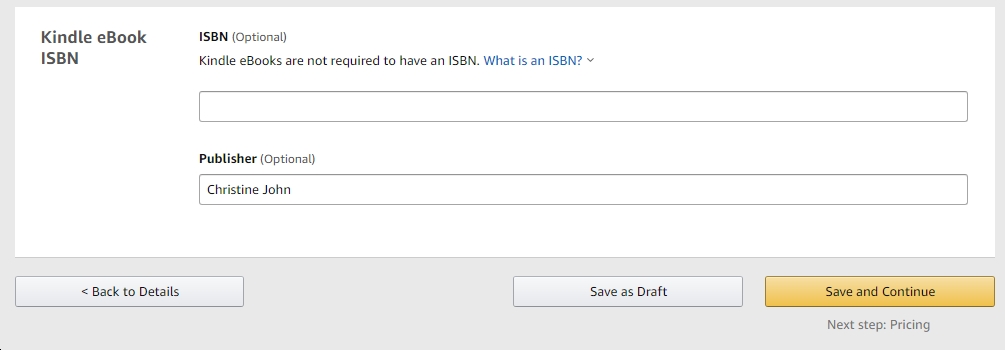
5. In the Kindle eBook ISBN section, you have the option to enter an ISBN number for your Kindle eBook. ISBN stands for International Standard Book Number. An ISBN number is used to identify your book. All printed books have ISBN numbers but it is not required for Kindle eBooks. Instead, Amazon uses an ASIN number to uniquely identify Kindle eBooks. If you want to assign an ISBN number to your book, you will have to purchase it. On the other hand, you can leave this section blank.
6. You also have the option to enter the name of the publisher of your book. Because you are self-publishing your book you can enter your own name, or if you own a publishing company you can enter your company’s name instead. Or you can just leave this section blank. The choice is yours.
7. When you have completed all of the sections on the Kindle eBook Content page, click Save and Continue to move on to the Pricing page.
Step 5: Set the price and royalty plan for your Kindle eBook.
On the Kindle eBook Pricing page, you can choose where you want to sell your book and you can choose how much you will charge among other things. Follow the instructions below to complete the final stages of your book.
- In the KDP Select Enrolment section, you have the option to enroll your eBook in the KDP Select program. What this entails is that your Kindle eBook will be sold exclusively on Amazon and nowhere else. This means you cannot publish your eBook on Draft2Digital or any other book publishing site or offer it for free from your website. This program lasts for 90 days and during this time you will be allowed to have 5 days to promote your eBook for free. This helps your eBook to reach a wider audience and it helps to create awareness of your new book. If you are new to self-publishing, I would recommend that you enroll your book in the KDP Select program and do a free book promotion campaign. When the promotion ends you should see an increase in sales of your book.

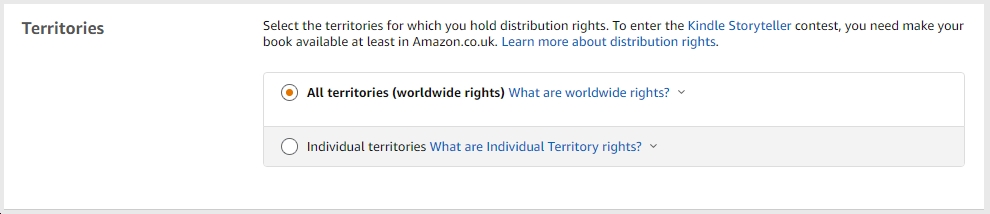
2. In the Territories section, you will be asked to select the territories where you hold electronic publishing rights for your eBook. Select All territories (worldwide rights) if you hold worldwide rights for your book. What this means is that your book is original and you have never published it before anywhere else. Then most likely, you have worldwide rights and you can choose this option for your book. By selecting all territories, your book will be sold on all of Amazon’s websites around the world. On the other hand, if you don’t have worldwide rights, select the option Individual territories and select the territories in which you hold rights to your book.
3. The Royalty and Pricing section is where you will choose a royalty plan and set the price of your Kindle eBook. Kindle Direct Publishing has two royalty plans you can choose from: 70% and 35% royalties. Your eBook must meet certain requirements depending on the royalty option you choose. Select the 35% royalty option if you price your eBook between US $0.99 and $200 on Amazon.com. Select the 70% royalty option if you price your eBook between US $2.99 and $9.99. There are other requirements your eBook must meet but you can go to List Price Requirements for more information.
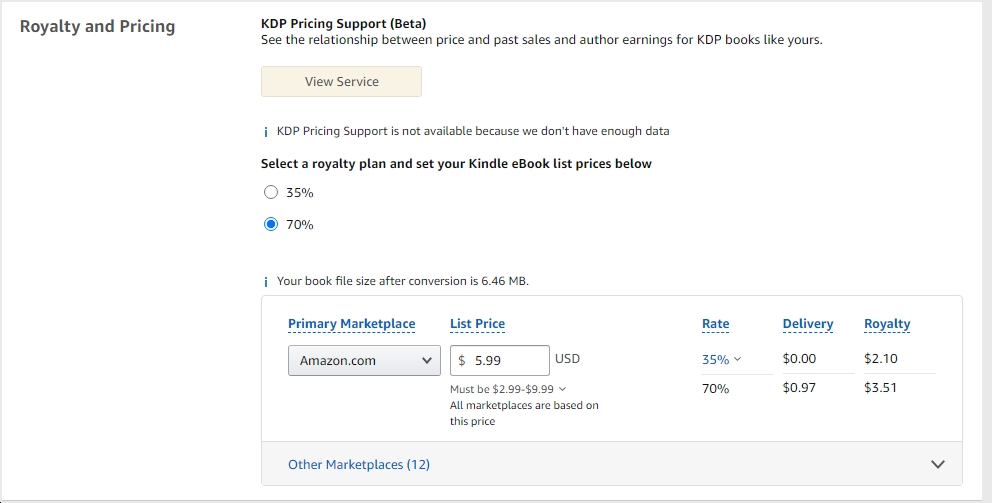
4. Under List Price, set the price of your eBook. You can visit Amazon.com and check out the price of other eBooks similar to yours to get an idea of how much you should charge for your book. Most eBooks are usually priced between $0.99 to $3.99. You might be able to enter a higher price if you have written on a popular topic that is in high demand. If you click on Other Marketplaces (12), you will see a list of prices and the royalties you will receive from all other Amazon websites based on the price you have entered.

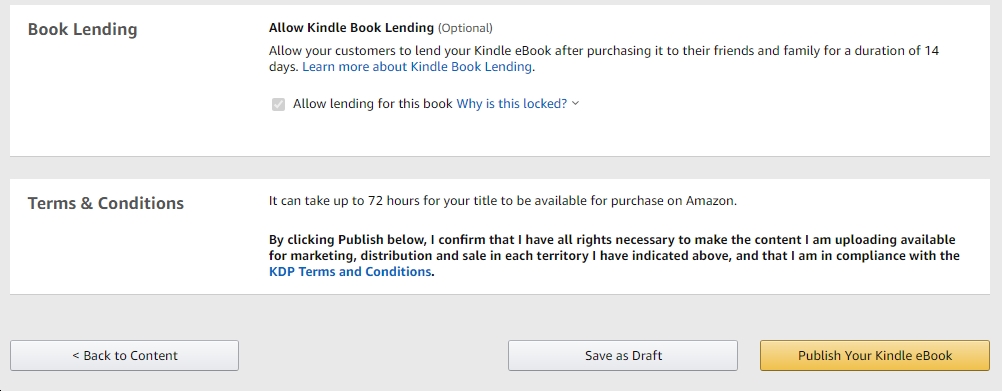
5. The Book Lending section allows your customers to lend your eBook to their friends and family members after they have purchased it. If you chose the 70% royalty plan, then your book will automatically be enrolled in the Kindle book lending program. However, if you selected the 35% royalty plan, then you have the option to select “Allow lending for this book”.
6. In the Terms & Conditions section, click on the KDP Terms and Conditions and carefully read this document to ensure that you will comply with KDP’s terms. Then, once you are satisfied with the royalty and pricing section, click Publish Your Kindle eBook. Your book will take up to 72 hours to be published and to appear on Amazon’s website. You will receive a notification and an email to confirm that your book is published and will be available on Amazon in 72 hours.
You can make changes to the title, content, price and royalty options for your eBook anytime even after it’s been published. That is the beauty of self-publishing your own book. You are in control of the content, formatting, designing, pricing and distribution of your book.
In the next blog post, we will cover how to publish your book as a paperback on Amazon.