
Last week we discussed the advantages and disadvantages of self-publishing on Amazon KDP and Draft2Digital.
Today we will cover how to format your book to publish on Amazon KDP (Kindle Direct Publishing). What this means is that you will be able to upload your completed manuscript to KDP so that it can be published as a Kindle e-book. If you wrote your book in Microsoft Word, then it will be very easy to format your book for Kindle.
First, if you have not signed up with Amazon KDP, you need to create a new account. If you already have an account with Amazon, you can use your same login details to sign up with Kindle Direct Publishing.
If you live in the UK, go to Amazon.co.uk. Scroll down to the bottom of the page and click on the link “Independently Publish with Us”. If you live in the US, go to Amazon.com, scroll to the bottom and click on the link “Self-Publish with Us”.
Click on Sign Up and Create Your KDP Account.
Enter your contact details and bank account information so that you can earn royalties for your book sales.
After you have signed up on Amazon KDP, then you can start formatting your nonfiction book. It is essential that your book is formatted correctly because this will have an impact on your reader’s overall experience viewing your book on their mobile device. You want to make sure that your sentences do not run on and on, and that your paragraphs do not contain any strange-looking characters. You also want to make sure that there aren’t huge chunks of white space and that the headings do not take up the entire screen.
I have self-published 13 e-books so far and I formatted all of them. So I can show you how to format your book quickly and easily. In this blog post, I’m going to show you how to format your nonfiction book for Kindle in the following steps.
Most standard nonfiction books contain the following sections:
- Title page
- Table of contents
- Introduction
- Chapters
- Conclusion
- About the author
- One last thing
- Other books by the author
There are some e-books which also include two other sections “Why I wrote this book” and “Why you should read this book”. Adding these two sections is optional. Your e-book should contain all of the eight sections listed above.
Step 1: Remove all formatting from your manuscript.
If you copied and pasted text from other programs into MS Word, chances are there may be different types of fonts that came from other places that could really mess up the formatting of your manuscript.
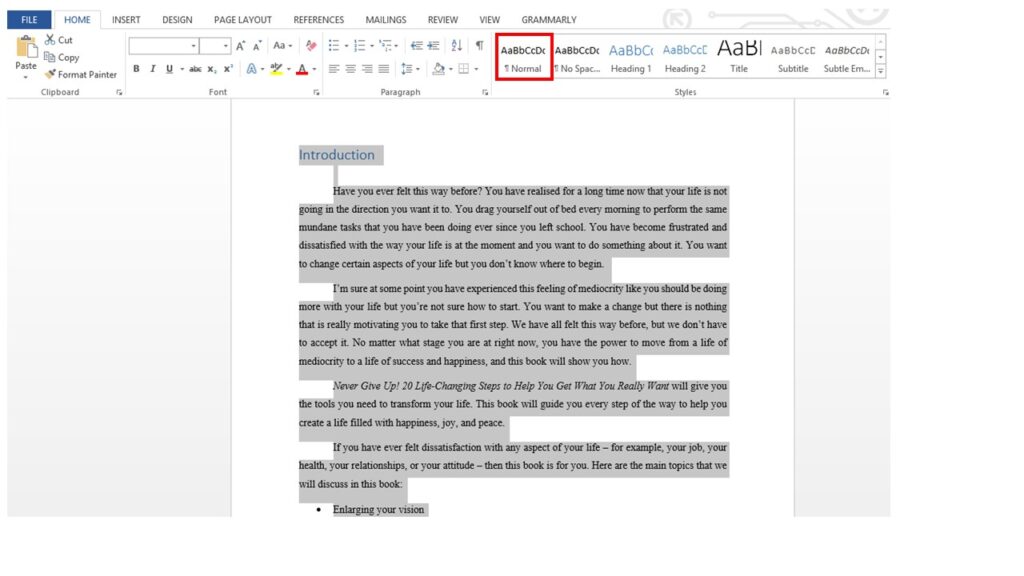
Press CTRL+A on your keyboard to select the whole text.
On the Home tab on the ribbon above, in the Styles section, click on Normal. This will remove any stray formatting from your text.
Step 2: Indent paragraphs and set line spacing
In this step, modify the Normal style formatting to indent paragraphs and set line spacing.
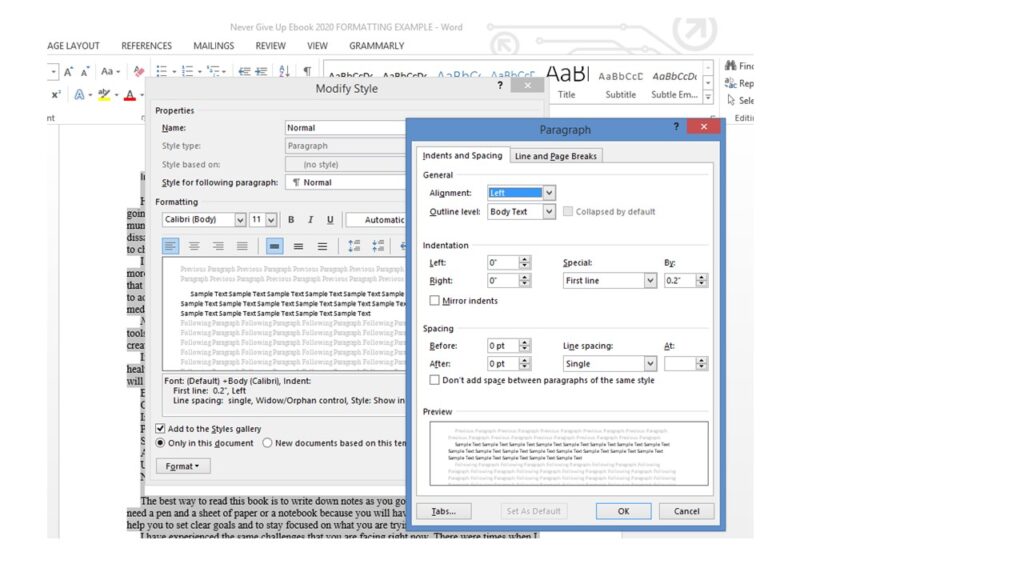
Ensure that the entire text is selected. Right click on the Normal style and select Modify. The Modify style dialog box will open.
At the bottom of the dialog box, click on Format. A drop-down list will open. Select Paragraph. This will open another dialog box.
In the Indentation section, under Special, set the First line indent to 2” (5mm).
In the Spacing section, set Before and After to 0 pt, and select the Line Spacing to Single and then click OK.
Step 3: Format the Title Page
In your book the title page should contain the title, subtitle (if you have one), and author name. You can also include a call to action.
Select the title in your document. On the Home tab above, click on Title in the Styles section. If you can’t see the Title style, click on the drop-down arrow to display all the styles.
Click on the Center text button to align the title in the centre.
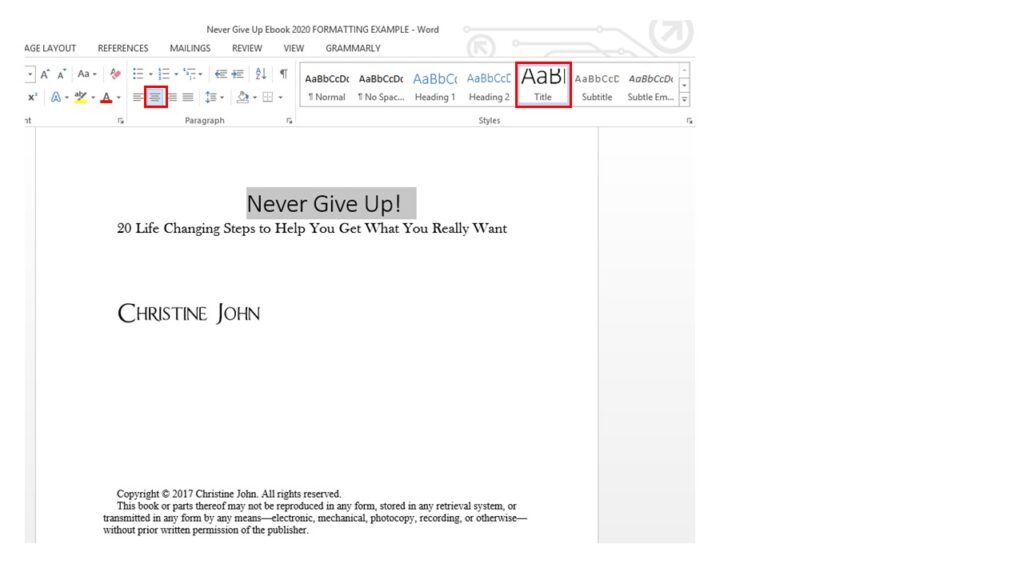
Select the Subtitle and Author name. Click on the Subtitle style from the Styles section and click on the Center text button to make them both centred.
Select the copyright section and click on Normal style to keep the copyright section as regular text and then click on the Center text button to centre it.
You have the option to include a Call to Action (CTA) on your title page. You could create a CTA to get your readers to sign up to your newsletter, download a free e-book, video or training course, or check out your blog.
To create a call-to-action link, select the CTA text, click on the Insert tab at the top and click on Hyperlink. Enter the website address and then click OK.
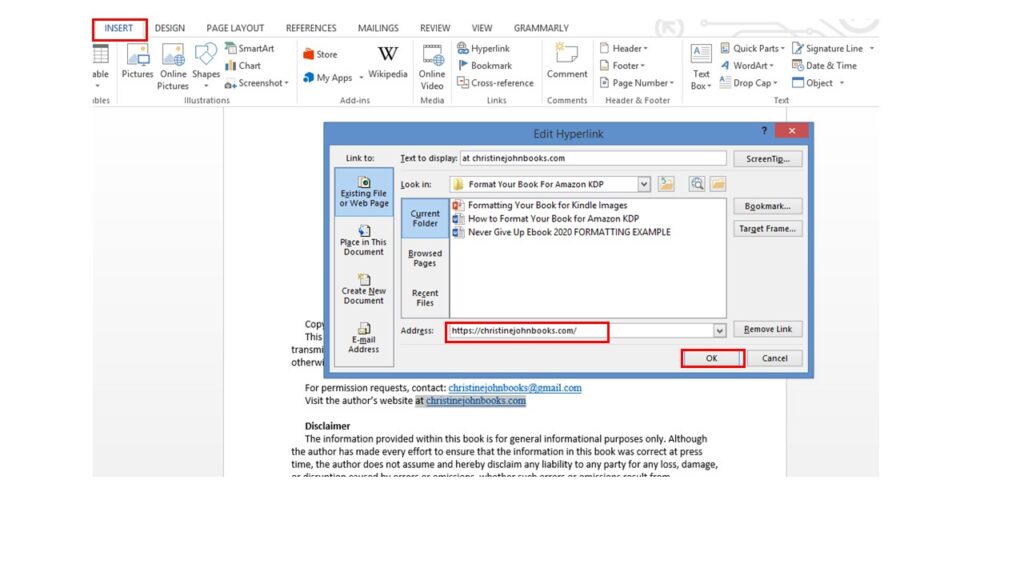
Test the hyperlink on your title page and wherever you have hyperlinks in your manuscript to ensure that they work. If you have any broken hyperlinks this may annoy your reader and they may stop reading your book.
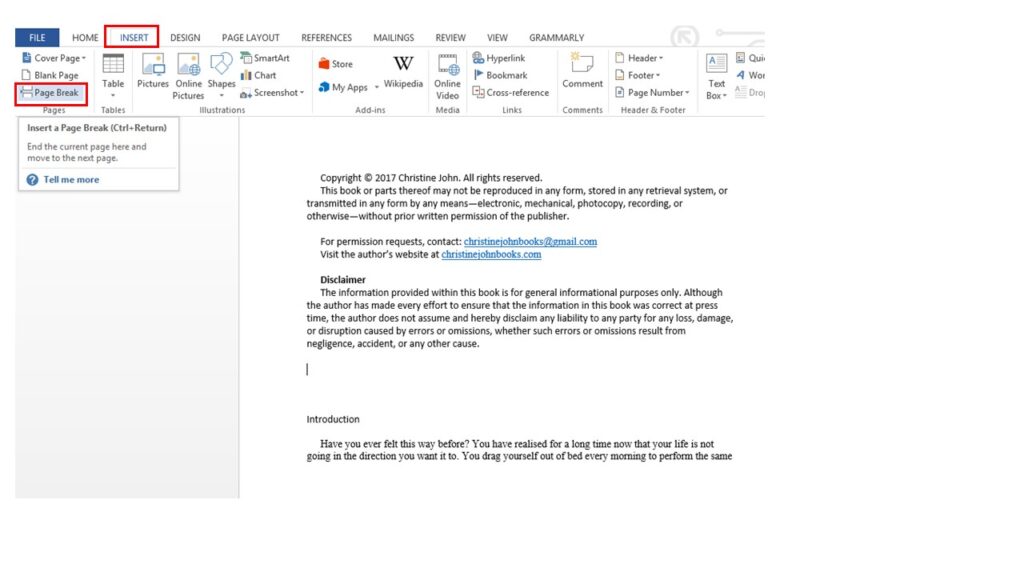
Step 4: Insert a Page Break
Click on the Insert tab and then click on Page Break at the end of the title page. The page break tells the Kindle or mobile device that it is the end of the title page and that a new page is starting. So the introduction will start on a new page. Insert a page break after every chapter.
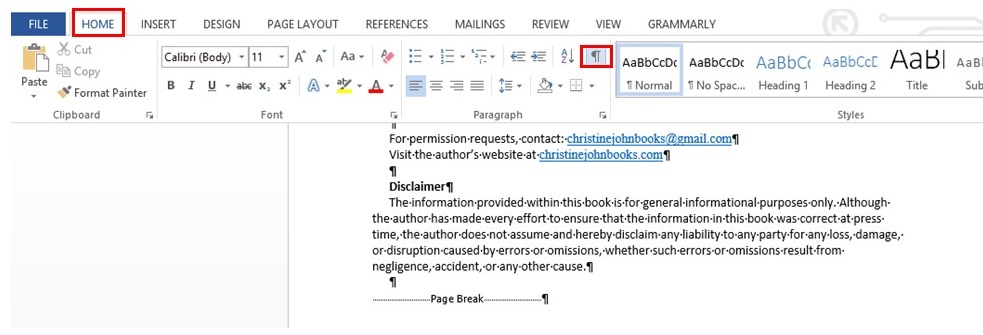
You will not be able to see the page break in your Word document because it is invisible. To ensure that you have inserted the page break correctly, go to the Home tab and click on the Show/Hide symbol. This will show paragraph marks, page breaks and other hidden formatting symbols.
Step 5: Format Chapter Titles
Apply Heading 1 style to all of your chapter titles. This will help you later when you have to create a Table of Contents.
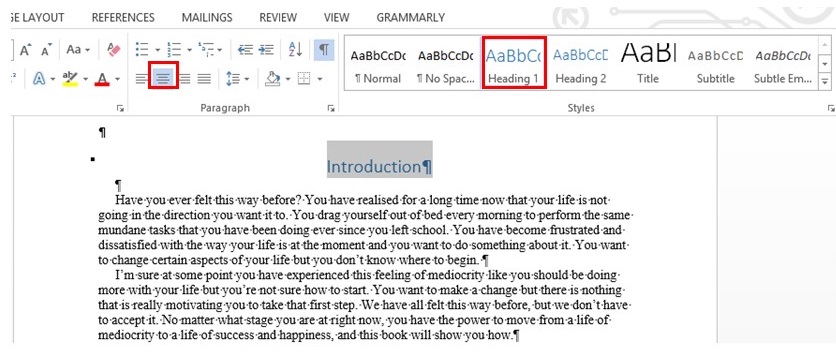
Select the Introduction title. On the Home tab, click on Heading 1 in the Styles section.
Click on the Center alignment button to place the title in the centre of the page.
Go through your manuscript and repeat these steps for each title.
If you have subheadings, click on Heading 2 in the Styles section and repeat for all other subheadings in your document.
Step 6: Justify the Text
Go through each section of your manuscript and select the body text. Click on the Justify text button on the Home tab to distribute your text evenly between the margins.
Step 7: Insert Images
If you want to include images in your nonfiction book, it is highly recommended that you don’t copy and paste images in your Word document. It is better to insert images into your file.
To insert images, click on the Insert tab.
Click on Pictures in the Illustrations section.
Select the image file from your computer and then click Insert.
On the Home tab, click on the Center text button to align the image in the centre. Repeat these steps to insert images in other sections of your document.
Step 8: Create a Table of Contents
In the previous step, the Heading 1 style was applied to all of the chapter titles. In this step, you need to insert a table of contents within your document.
Click in the section where you want to insert the table of contents (TOC). It usually appears after the title page.
Click on the References tab and click Table of Contents.
Select Automatic Table 1. The table of contents will appear in your document.
Click Table of Contents again and select Custom Table of Contents.
Click on the Show Page Numbers box to clear it, set the Show levels to 1, and click OK.
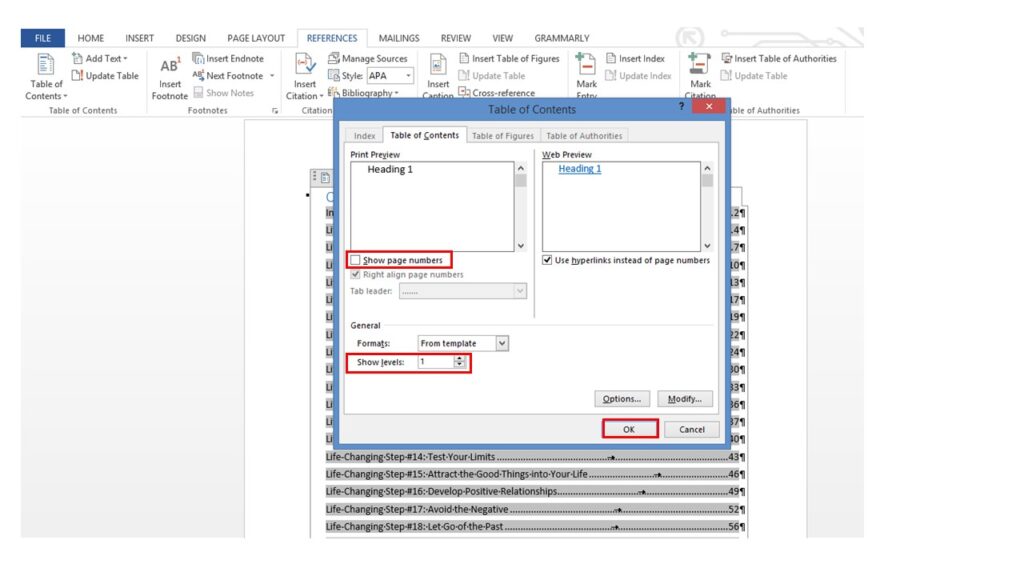
A dialog box will open asking if you want to replace the table of contents. Click OK.
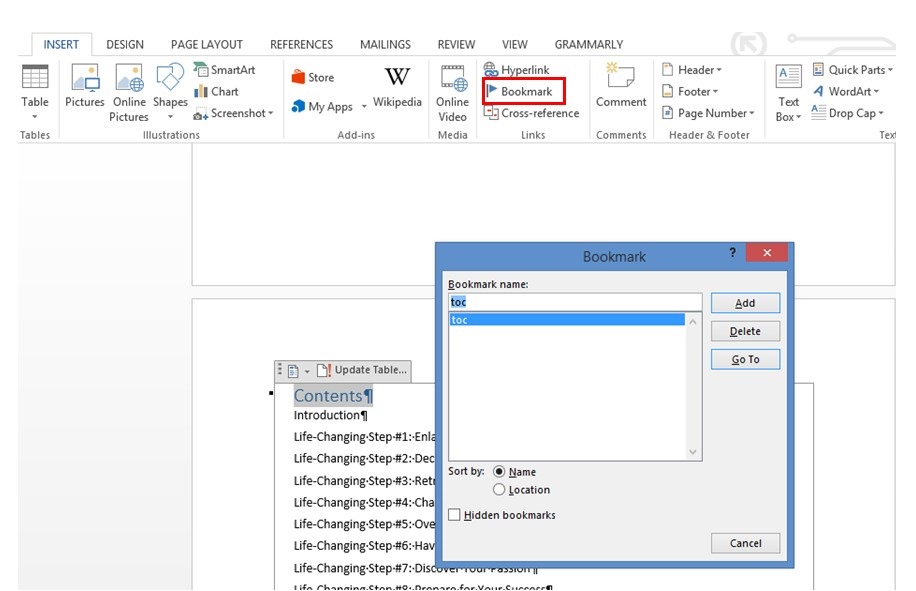
Next, select the table of contents title Contents.
Click on the Insert tab, and click on Bookmark in the Links section.
Type toc in the Bookmark name field and click Add.
After the table of contents, insert a page break.
Go back to the Home tab and click on the Show/Hide button to hide the paragraph marks, page breaks and other formatting symbols.
Now that you know how to format your book for Kindle, next week I will also show you how to format your book for Draft2Digital. Then you will learn how to create a cover for your book.